Repairing Your Car at Home
02 June 2020 / [email protected]
Most car owners are meticulous when it comes to maintaining the appearance and roadworthiness of their vehicles. Their frustration is very evident whenever their car accumulates scratches, dents, rust and damaged leather seats.
Going to a reliable car diagnostic and repair shop is always a great idea but if there are some damages that you can repair yourself and save money in the process, you would take that opportunity, won't you?
If you consider yourself a proud car owner, here are a few fixes and tips to keep your car looking the best for as long as you can.
How to repair scratches on your car
Car scratches are caused by a variety of things. Car park blunders, vandalism, careless pedestrians, falling tree branches and car accidents are just some of them. If you adore your perfect paint job, it would certainly be frustrating to see a scratch or two on your beloved car.
No two scratches are the same. If the scratches are just minor or the damage is found on the clear coat or base coat, you can purchase a few products and add some elbow grease to reduce its unsightly appearance on your car.
Try running your fingernail over the scratches to determine if they are just occupying the surface or are deeper than what it seems. For surface scratches, you may want to try polish paste.
Before you repair scratches on your car, you should wash the damaged area and dry it thoroughly because rubbing dirt and debris into it will only make the damage worse. Once you're done, apply a penny-sized amount of toothpaste to a damp microfibre towel and rub it in with a circular motion to buff out the scratched area. Don't forget to apply adequate pressure while rubbing but don't overdo it.
After rubbing the damaged surface, wipe off excess polish paste, rinse it with water and dry it using a microfibre towel. You may have to repeat this process until the surface scratches are barely visible. To prevent damaging the clear coat on your car, don't do this process more than three times.
If you prefer to use a scratch removal product instead of polish paste, just follow the same process. If the scratches are way too deep and way too extensive, call a specialist who can help you!
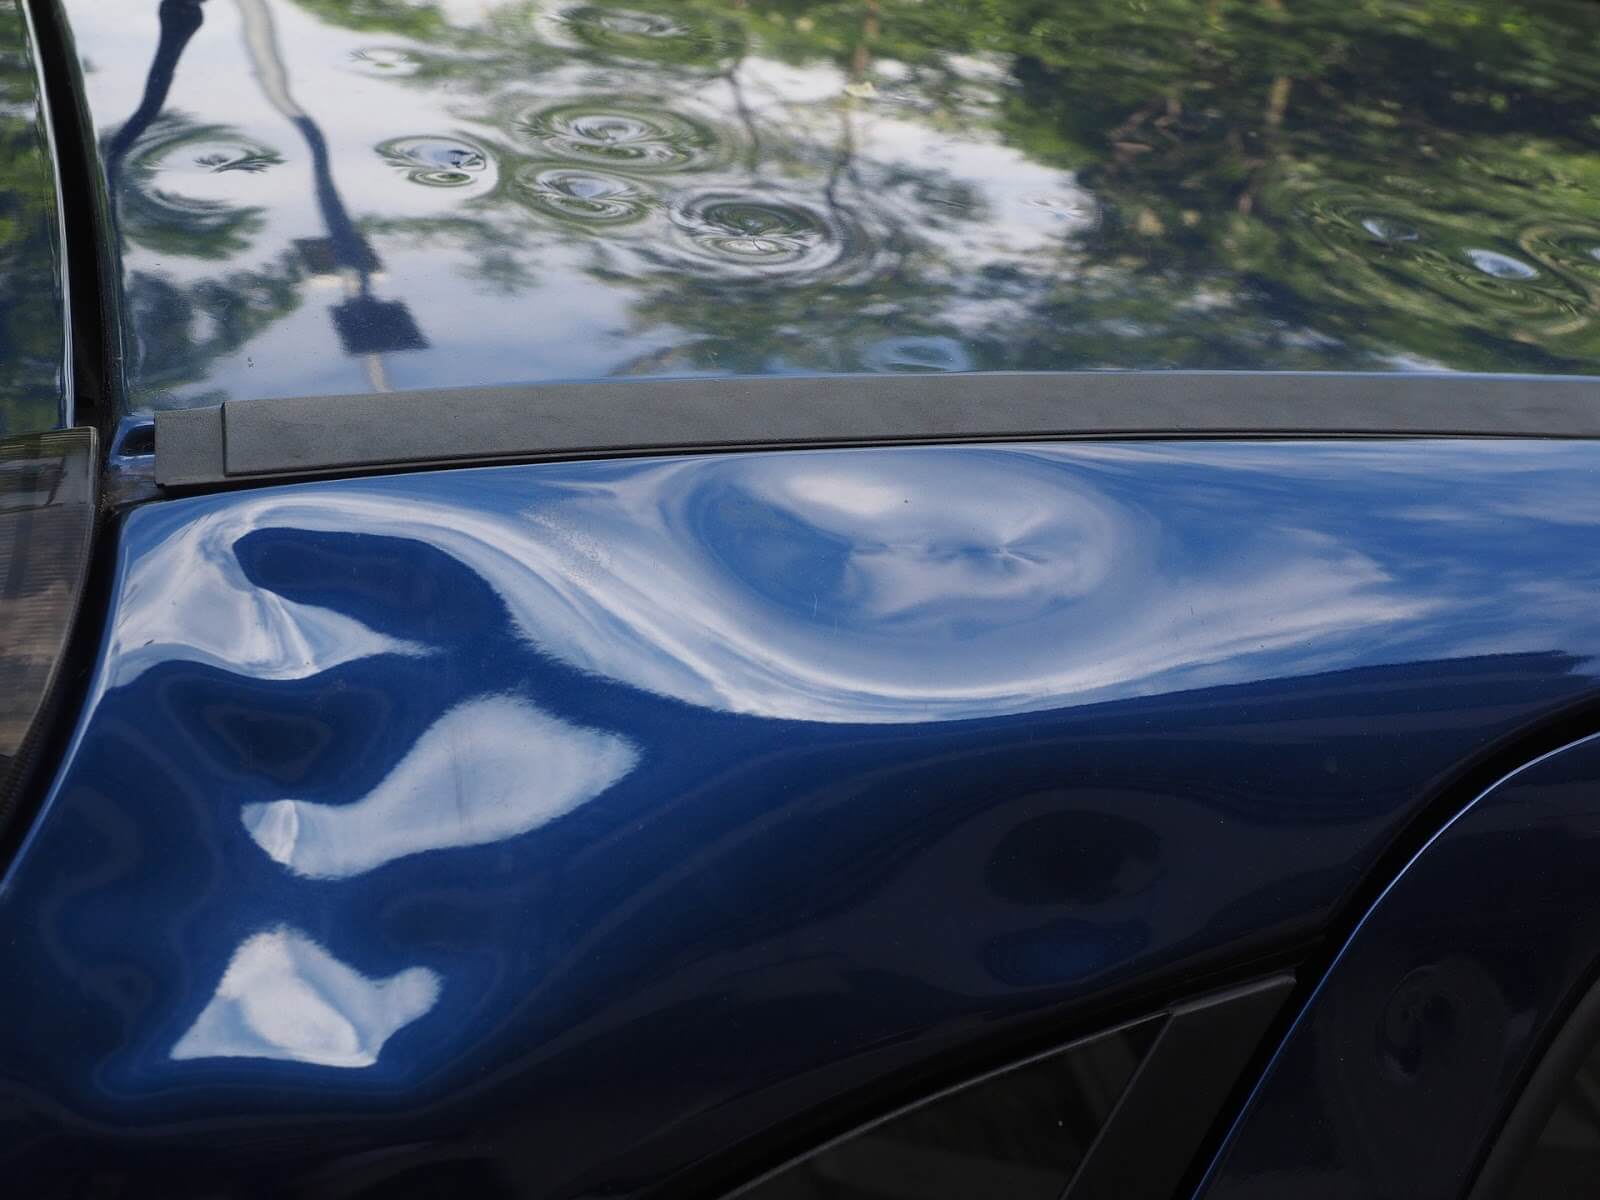
How to repair a dent in your car
Aside from scratches, there's nothing more bothersome than getting a dent on your car. Being a careful driver doesn't guarantee that you can avoid it. Having it looked after by a professional can be costly that many of us would prefer to leave it alone rather than lose a couple of pounds.
Small dents, however, can be straightened out with a few tools that are already available in your house. So if you don't want to lose sleep over your dented hood, bumper, or door, here are a few methods you want to try.
The Knockdown Method. This method is the simplest one of them all. All you need is elbow grease and your hands or a rubber knockdown to push the dent out.
The Suction Method. This trick needs a regular plunger to get a small dent out. This method is great if the dents are on your side panels or doors. Just use the plunger as you normally would but don't be too aggressive to prevent further damage. To provide the suction, other car owners have used vacuum cleaners or speciality tool kits that are available online.
The Temperature Change Method. The internet is filled with videos using this method. One easy way to pop out a dent is to use dry ice. Just rub it in the centre of the dent and see it pop out on its own. Be reminded that you need to wear gloves to protect your hands from dry ice.
Another way is to use boiling water, heat gun, or hairdryer. Apply heat over the dent and allow the area to expand then spray cold compressed air over it and allow it to contract, basically popping the dent out. In some instance, you may have to use a plunger, rubber knockdown, or your hands then apply the appropriate force to push the dent out.
How to repair your leather car seats
Your leather car seats are not immune to wear and tear. Eventually, you'll get small holes or cracks which you can repair on your own.
You can purchase a repair kit with a colourant that matches the leather of your car seat. Your car manufacturer may offer this product. Otherwise, you can find other kits and find a colour that will match your upholstery.
Repair kits will require you to glue a backing cloth behind the tear, build up layers of leather filler, sand down the leather filler, apply leather colourant to the filler and cover the entire area with a leather sealant.
Another do-it-yourself option is to cover a patch of leather over the tear by using a leather glue.
You can use liquid leather to fill up the damaged areas. Liquid leather combines the sticking power of an adhesive compound and the coating power of a combination filler. All you need to do is wipe a diluted amount of it over the thoroughly cleaned worn out areas.
If the leather rips and gouges are too big for any of the three options, it is best to ask for assistance from car repair or upholstery experts!
How to repair rust on your car
Finding a brown stain on your step bumper or a paint bubble on your fender or bottom of your door means only one thing: rust has been hard at work.
There are three types of rust that can affect your car; surface rust, scale rust and penetrating rust. You can manage surface rust at home but for scale and penetrating rust, you need the help of a professional.
The best way to combat vehicular decay is to prevent it from happening in the first place but if the iron worm has already made its way on your vehicle, here's how you can stop surface rust from spreading further.
Before you start working, prepare all your materials and workspace. Once you're ready, go ahead and cover your vehicle with plastic sheeting, exposing only the area you need to repair. Wear your safety gear (dust mask, gloves, and protective goggles).
Clean the affected surface area with wax and grease remover then use sandpaper to remove the rust spots. Clean the surface again and make sure it’s free from dust.
Prime the clean surface with an epoxy primer, spray a base coat, and cover it with a clear coat. Allow the epoxy primer, base coat, and clear coat to dry thoroughly before each application. Finally, to polish your work, hand-buff the area using a microfibre or cotton cloth and buffing substance.
To maximise your effort, do not wax your vehicle within 30 days.